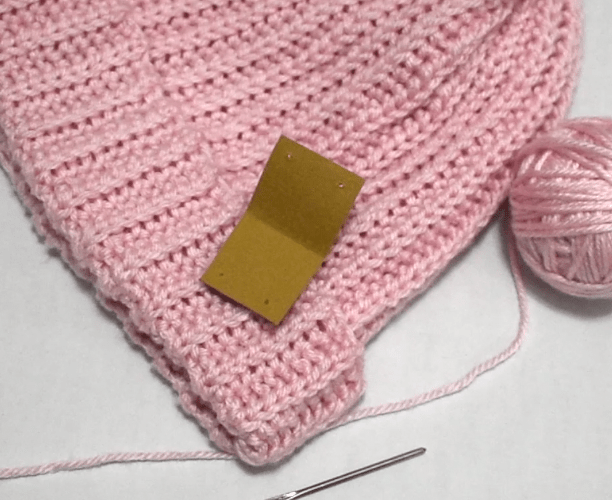
After making a couple of items myself sewing and crochet it left me thinking about tagging the things I make. Many tags can be annoying, itchy or add to the overall item. The purpose however is to never forget where the item was purchased. Without tags people inevitably forget where they purchased the item and it can even make an item appear “cheap”. A tag is like a finishing touch which is why after researching them I decided it was time to experiment and create my own.
For the holidays I had a lot of content planned and per usual they fell short. I could say I was too busy, however that was not the case. For some reason my mind gets stuck on certain projects and it is hard for me to pivot before they are 100% complete. Bouncing back and fourth has never been a strong suit of mine and is something I need to work on.
The fall weather has finally hit California which means its sweater weather. On dreary days we still take out the pups to walk as long as it is not a major down pour. After getting ready for our first sprinkling walk, my little nephew literally shook off his coat. In other words, he went without as it would have been more of a hinderance than anything else. Once the walk was over I wanted to fix his little jacket since hopefully there will be more dreary walks in this desert this season.
Although I have not officially classified launches for Custom Little Beasties when the shop first opened this is the first revamp of the shop which sort of classifies it as the second launch. The shop has come along way and I have learned a lot along the way. How to make things more efficient as well as experimenting with new ideas.
Learning how to use an embroidery machine is tricky enough so, let’s discuss some basics to make it easier to design with fonts. Softwares for embroidery are pricy but luckily there are some free options. Embrilliance’s free tier is called Essentials which allows you to add and edit fonts together. This means that all the designing is done on the computer rather than on that tiny screen of your machine. The program even allows you to add multiple font styles together to make it one step on the machine. Set a guide for your specific hoop size that will alert you if your design won’t fit. Simply design and then export it onto a USB just as you would with a design file.
Although I would not say I am anywhere close to being an expert at embroidery, looking back I have learned A LOT. If you recently purchased a machine or are curiously researching machines, this next mini series is full of helpful information to get you started. Today’s focus is on digital embroidery files, which seems like an easy concept, however, there are things that can may catch you off guard if you are not careful. First realize that each machine has a set size limitation so depending on how large your embroidery field is depends on which files the machine is able to read successfully.
While I do not have a “successful” Etsy shop yet I have been learning as I go. At this stage I am learning a lot so rather than be ashamed of having the few orders I do I decided it was the perfect time to share my knowledge to help other new Esty shop owners or those curious as to if Etsy is a good place for them to sell their crafts. In the video today it showcases how I package an order which in itself is always fun to see how people do it and what they include in their packages. Also discussed today is the actual stats for this listing meaning what the profit margin is as well as where the rest of the money actually goes when selling on Etsy. Shop owners usually say that they are “successful” and that Esty takes a portion of the money but I’ve yet to see someone share the raw data. I know I was curious before opening up my shop and yes Etsy gives a full description and calculator on its site, however, I did not find it helpful or accurate. It is very misleading which is why I am breaking it all down for you so you can do the math to figure out how to properly list your items.
Stats Cheat Sheet
Listing Fee: $0.20
Relisting Fee: $0.20 * They will charge a $0.20 relisting fee to change the stock number to the next digit and keep the item listing for sale.
Shipping Label: Depends on the weight and size of the product and will not effect your profit unless you are offering free shipping. The label is added into the order total which is added in through the processing fee.
Processing Fee: 3.0% of the order total plus $0.25
Transaction fee for Shipping: 6.5% of shipping total
Transaction Fee for Product: 6.5% of item total
Sales Tax: is collected from the buyer and does not effect your stats but is calculated towards the processing fee since it is down with the order total.
*The simplest way to calculate your portion is to calculate 78% off your listing price. Yes that means the other 22% goes stickily to lovely Etsy fees. Keep in mind this is a rough estimate to simply help guide you to create your proper pricing. From the 78% you will also need to dive in a little further by subtracting all material costs. Next subtract your personal labor cost and then you will have your profit total.
Example: A handmade blanket listed for $50 without free shipping. The item cost $7.95 for the customer to ship to their residence and the tax rate is 7.5%. The customer paid $61.75 total.
Fee
Fee Amount
Running Total
Processing Fee: 3.0% of the order total plus $0.25
$1.85 + $0.25 = $2.10
$59.65
Shipping Cost
$7.95
$51.70
Transaction Fee for Shipping: 6.5% of shipping total
Over the past year I have tried my hand at reselling clothes and various items. Currently, I’ve sold over sixty items! As time has progressed so have my strategies of creating quality listings. Below are my top tips for creating listings that leave viewers with all the information they need in order to purchase your items with confidence. One thing I would not recommend wasting your time with is creating a fluffy description. Instead fill the description section with essential information. I have created a cheat sheet list down below of what I recommend putting in the description section. Also use these tips to up your photography skills for flat lays and more. If you would like to see how I edit my photos for listings please let me know. (:
How to: Create a Larger than Hoop Embroidery Project
When I first started exploring machine embroidery it wasn’t until my first couple projects that I realized that the hoop size really mattered. With a 4X4 hoop machine it can seem like a creative jail so today I am going to show you how to escape. In the video below I will be demonstrating the tips I am discussing here which is the method I used for today. For those that are not aware I currently have the Brother PE550d embroidery machine which is a 4 X 4 hoop machine.
Since it has been awhile, I thought a life update was well over due. A lot has happened or rather not happened depending on your perspective. Whenever I start to compare my progress to others my age or just in general it can be a real downer since the expectations I’ve put on myself are based on societial guidelines that ,have yet to be met. You can’t be too far ahead or too far behind and it’s a constant battle that is impossible to win. Perhaps everyone feels this way yet from the outside it looks like others have it all figured out. Let me know in the comments if you feel like you’re on track or if you’ve never thought about it? Not sure how you couldn’t think about it as people question when you’ll get married, when you’ll have a kid and the list goes on and on.