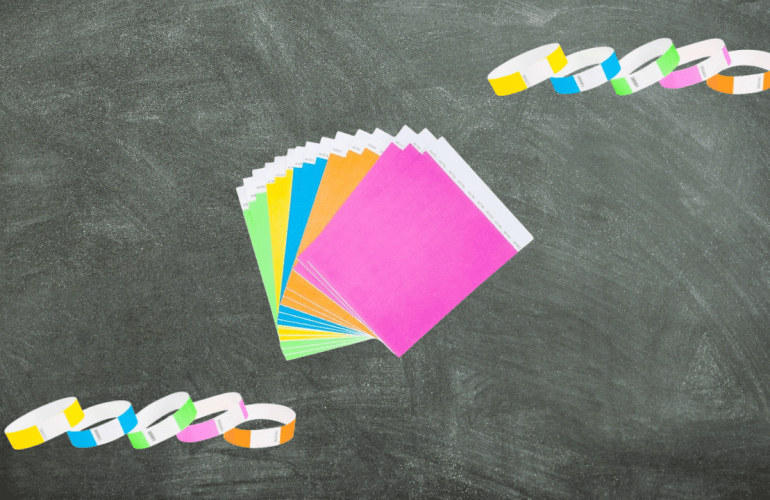
Kids are known for forgetting to give parents school flyers/ reminders so here is a diy for teachers who want the information to actually get to parents. These bracelets are not only fun colors but also customizable with a printer. Similar to a festival, concert or fair wristband, they are easy to put on and require being cut off. For this specific project, I customized the bracelets for my husband’s school for a back to school night reminder. The kids were ecstatic to get their bracelet put on because it was something new and different thus creating more of a hype to share when they got home. This project could be used for field trip groups, various events and even birthday parties. You can put anything on them! Printing is the only tricky part but if you pay close attention to the tutorial it is a piece of cake. I ruined about four sheets from simply not changing the paper size which was annoying. Remember to be patient with yourself!
Tag: advice
How to: Fix Self Threader on Embroidery Machine
While posting videos about my embroidery machine a couple of people have asked how to fix the self thread feature. At the time I did not know how to help as I had never experienced an issue with the self threader on my embroidery machine. Fast forward a couple of months, now the self threader on my machine stopped working. Sometimes it would work and sometimes it wouldn’t. Once the self threader stopped working consistently, I decided to try to diagnose what was wrong.
Continue reading ➞ How to: Fix Self Threader on Embroidery Machine
How to Change the Hoop Size in Embrilliance
One question I often get asked is how to change the hoop size in Embrilliance. There are a few videos where I have explained how to do this but I wanted to dedicate a video solely to hoop sizes for people to reference. Whether you want to change your hoop to a smaller one or you’re trying to find the multi-hoop function, this video is for you. I have absolutely fallen in love with multi-hoops since it cuts down the amount of re-hooping and eliminates the stress of lining up a design.
Continue reading ➞ How to Change the Hoop Size in Embrilliance
Lorcana Unboxing Ursala’s Return & First Chapter
Switching up things a little because I have recently fallen into the world of card games. Loracana is my very first one and it has been almost a month and a half since my husband and I started playing. I love Disney and watching these types of unboxing mystery pack videos, so with the new expansion out, I thought I would make one of my own. This is set number four, Usala’s Return, which we preordered at our favorite game store, as items from the set are selling out fast. Items from this set are already selling for twice as much as they retail, if not more. On ebay the Illuminaires Quest game was selling for $7,000 which is insane! With a stroke of pure luck we were able to secure one, however, with their current market value I am having mixed feelings about opening it. Currently it is on pre order until the set comes out to major retailers on the 31st of May, which is where we ended up finding one.
Continue reading ➞ Lorcana Unboxing Ursala’s Return & First Chapter
Update | How to- Backpack Repair
Over the past couple of weeks a few people have asked for an update on my backpack repair solutions video/post. While I still believe the methods used are good options they only solved about 75% of its issues for me. In other words, depending on the bags, materials, and placement of the hole or fray, they may not be completely effective. For instance, the Tender Touch has started lifting in some areas and since the bag is mostly plastic, that is flaking apart. Also, the part of the bag that still possesses a hole is mainly due to the fact that it was a tricky area to adhere to at the start of the repair.
Repair Holes & Stop Fraying | Purses and Backpacks
Throughout the years your backpack and or purse goes through a lot. Perhaps a hole or fraying is an excuse to purchase a new one. If you are having trouble letting go of your beloved bag, because it has been with you through thick and thin, here are some ways to mend it. Let me state that the bag which I use in this tutorial is well over twenty years old, and is one of my all time favorites. The wear and tear on it is pretty brutal.
Continue reading ➞ Repair Holes & Stop Fraying | Purses and Backpacks
Picture Embroidery | Multi-Position Hooping
While it is possible to do multi-position hooping manually with free software, when it comes to picture files it is not. Being able to split up graphics in embroidery is a game changer. For instance, some creators simply do not design 4X4 hoop designs, so being able to use a 5X7 design opens up new file options. Also, some files that say they are 4” but are too large for an actually 4X4 hoop can be used with multi-hooping.
Continue reading ➞ Picture Embroidery | Multi-Position Hooping
Enlarge your Embroidery Machine Field | Multi-Position Hooping
Feeling like you’ve picked the wrong embroidery machine and contemplating purchasing a new one? Before paying out hundreds of dollars if not thousands on a new machine, try a multi-position hoop. Out growing a machine sucks but thankfully there are ways to hack the system to go beyond the hoop’s limitations.
Although using a multi-position hoop is not 100% free, it is a whole lot cheaper than a new machine. There are two things required for multi-position embroidery, software and a specific hoop. The software I chose is called Embrilliance Essentials, which cost $149.95. Multi-position hoops can be found on Amazon in sets or singles for around $15.99. These hoops have four notches rather than the standard two.
Continue reading ➞ Enlarge your Embroidery Machine Field | Multi-Position Hooping
Larger than Hoop Embroidery | Multi- Hooping Free
While it may seem like you need a larger hoop to accomplish certain creative projects try this multi hooping hack first. This is a free solution when you want to escape the boundaries of your machine’s hoop size. The machine I use is the Brother PE550d which has a 4X4 hoop, so trust me I know the struggle.
Continue reading ➞ Larger than Hoop Embroidery | Multi- Hooping Free
Custom Wedding Invitations DIY
While it may seem daunting to create your own wedding invitations from scratch, the process was actually pretty fun. The ordering process as mentioned in a previous post was the most stressful thing because not many places allow you to upload invitations to be printed. My recommendation would be to use a local shop and save yourself the headache or use Shutterfly. Prior to ordering anything create a template mock up of all the elements of the invitation. For ours, the elements included the base invite, a recipe card, rsvp card, a belly band, glitter ribbon and a sticker. When using multiple pieces it is sometimes hard to envision the full look so make sure not to skip this step. I ended up changing dimensions after creating a mock up since the ones online ended up looking funky when put together.


